
How to Reupholster Vintage Chairs for a Fresh Look – Step-by-Step Guide
Introduction
Vintage chairs hold charm and character, but over time, their upholstery can wear out, fade, or simply go out of style. Instead of discarding them, why not give them a fresh look? Reupholstering a vintage chair is an excellent way to breathe new life into your furniture while preserving its historical charm.
In this guide, we will lead you through a detailed procedure to reupholster vintage chairs, guaranteeing a polished and fashionable result. Whether you're a beginner or an experienced DIYer, this guide will help you restore your cherished piece beautifully.
Table of Contents
1. Why Reupholster Vintage Chairs?
2. Tools and Materials You’ll Need
3. Choosing the Right Fabric
4. Preparing the Chair for Reupholstering
5. Removing Old Upholstery
6. Repairing and Refinishing the Frame
7. Adding New Padding and Batting
8. Cutting and Attaching the New Fabric
9. Finishing Touches
10. Pro Tips for a Professional Finish
11. FAQs on Reupholstering Vintage Chairs
1. Why Reupholster Vintage Chairs?
Reupholstering vintage chairs offers several benefits, including:
· Preserving history—Vintage chairs often have unique craftsmanship that modern furniture lacks.
· Customization—Choose your fabric and style to match your décor.
· Sustainability – Reduce waste by upcycling old furniture.
· Cost-effectiveness – High-quality vintage chairs are often sturdier and more affordable to refurbish than buying new furniture.
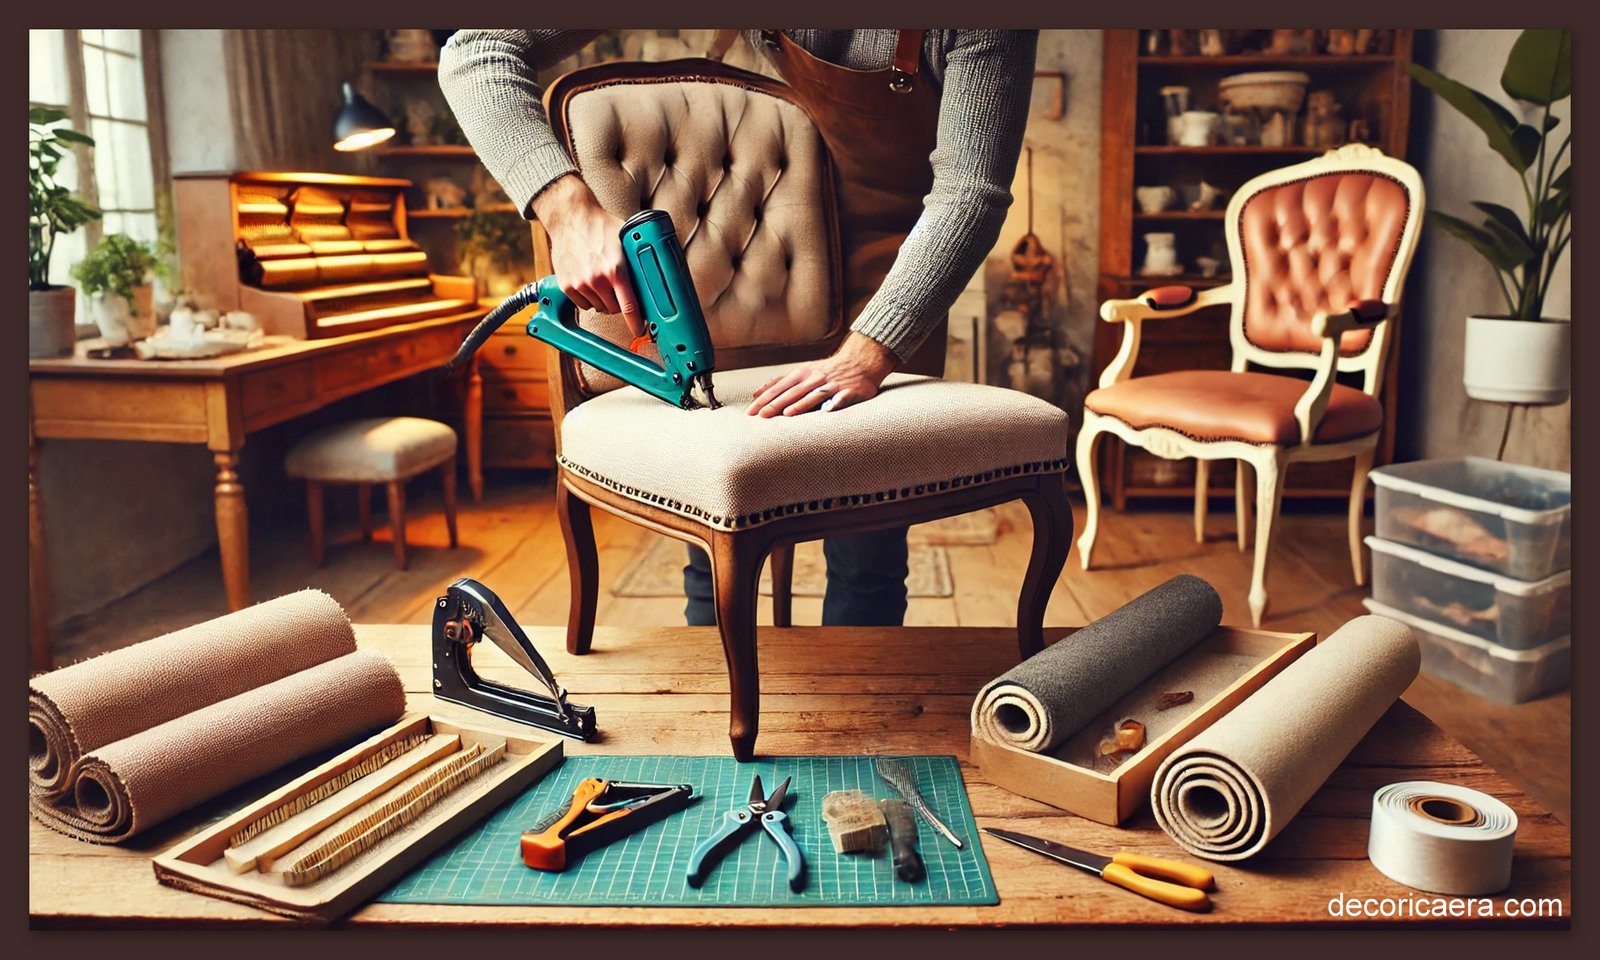
2. Tools and Materials You’ll Need
Before starting, gather the following tools and materials:
Tools:
✔ Staple gun and staples
✔ Upholstery scissors
✔ Screwdriver (flathead and Phillips)
✔ Pliers (for removing old staples and nails)
✔ Hammer and nails (if needed)
✔ Sewing machine (optional for piping or seams)
Materials:
✔ New upholstery fabric
✔ Foam padding
✔ Batting (cotton or polyester)
✔ Upholstery tacks or decorative trim (optional)
✔ Fabric glue (for additional security)
3. Choosing the Right Fabric
The fabric you select can make or break the look of your reupholstered chair. Keep these factors in mind:
· Durability – Choose heavy-duty upholstery fabric for long-lasting results.
· Color & Pattern – Pick a shade that complements your space. If your chair has intricate details, a solid fabric may work best.
· Texture—Velvet, linen, or faux leather can add different aesthetics.
· Simplified Cleaning – Choose materials that are stain-resistant or can be washed in a machine.
Pro Tip: Buy extra fabric (around 20% more than needed) to account for mistakes or future repairs.
4. Preparing the Chair for Reupholstering
· Clean the chair frame thoroughly.
· Check for any loose joints or broken parts and repair them before starting.
· Take clear photos of the existing upholstery to use as a reference when applying the new fabric.
5. Removing Old Upholstery
This step requires patience and care:
· Use a flathead screwdriver or pliers to remove staples and nails from the old fabric.
· Label each piece of removed fabric to use as a template.
· Be careful not to damage the frame while removing upholstery.
Pro Tip: If the chair has original webbing or springs, inspect and replace them if necessary.
6. Repairing and Refinishing the Frame
Before attaching new fabric, take the time to fix up the chair’s frame:
· Sand down any rough edges and repaint or stain the wood if needed.
· If there are cracks, use wood glue and clamps to secure them.
· Let the chair dry completely before continuing.
7. Adding New Padding and Batting
· Foam Padding: Cut and shape new foam padding to replace any old or worn-out foam.
· Batting: Lay batting over the foam for extra softness and to create a smooth surface.
· Securing Layers: Staple the batting tightly to the chair frame, trimming excess material.
Pro Tip: Use high-density foam for better durability and comfort.
8. Cutting and Attaching the New Fabric
Now comes the fun part—adding fresh fabric!
· Fabric Cutting: Utilize the old upholstery sections as patterns to cut the new fabric.
· Attach Fabric: Start from the center and work outward, pulling the fabric taut to avoid wrinkles.
· Stapling: Secure the fabric in place with a staple gun, ensuring even tension.
· Corners & Edges: Tuck and fold neatly for a professional finish.
Pro Tip: If your chair has buttons or tufting, consider adding new ones for an elegant touch.
9. Finishing Touches
· Add decorative trim, piping, or upholstery tacks for a refined look.
• If your chair features a detachable seat cushion, sew a coordinating cover for a unified look.
· Check for any loose staples or fabric edges and secure them neatly.
10. Pro Tips for a Professional Finish
Operate in a well-illuminated space to identify any flaws.
Utilize a staple remover tool to correct errors effortlessly.
Reinforce weak areas with extra staples or fabric glue.
Test the chair for comfort before finishing to ensure proper padding.
11. FAQs on Reupholstering Vintage Chairs
Q1. How long does it take to reupholster a vintage chair?
It depends on the chair’s complexity, but expect 4-8 hours for beginners.
Q2. Can I reupholster a chair without removing the old fabric?
In some cases, yes, but removing the old fabric ensures a cleaner and more professional look.
Q3. What’s the best fabric for reupholstering vintage chairs?
Sturdy materials such as linen, velvet, or polyester blends are ideal for longevity.
Q4. Do I need to sew anything when reupholstering?
Not necessarily. Many chairs can be reupholstered using only staples, but sewing may be needed for piping or cushions.
Q5. How much does it cost to reupholster a vintage chair?
DIY reupholstering costs between $50 and $200, depending on fabric choice and supplies.
Final Thoughts
Reupholstering a vintage chair is a rewarding DIY project that allows you to restore beauty and functionality to an old piece. With the right tools, fabric, and techniques, you can give your chair a fresh new look while preserving its vintage charm.
So, grab your staple gun, pick out your favorite fabric, and start transforming your vintage chair today!
Have you reupholstered a chair before? Share your experience in the comments!


